
SCIM User Provisioning (Azure AD/ Entra ID)
Set up Azure AD/ Entra ID to provision your team or district’s SCIM (System for Cross-domain Identity Management).
Only admins can enable, configure, and change their organisation's Security and SSO settings.
Supported provisioning features
- Create users - Users in Azure AD/ Entra ID assigned to the Colloquial App are added as members of the organisation in Colloquial.
- Update user attributes - Updates made to the user's profile through Azure AD/ Entra ID will be pushed to Colloquial.
- Deactivate users - Deactivating the user through Azure AD/ Entra ID will lock the user in Canva.
- Assign or update roles - Roles assigned to users through Azure AD/ Entra ID will be pushed to Colloquial.
Step 1: Configure Azure AD/ Entra ID SAML
Azure’s built-in Colloquial application only supports SAML. To set up SCIM, complete the setup instructions Using Colloquial SAML Single Sign-On with Azure AD/Entra ID.
Step 2: Get Colloquial's SCIM provisioning API token
- Log in to your Colloquial account.
- On the upper corner of the homepage, click the cog icon to go to Settings.
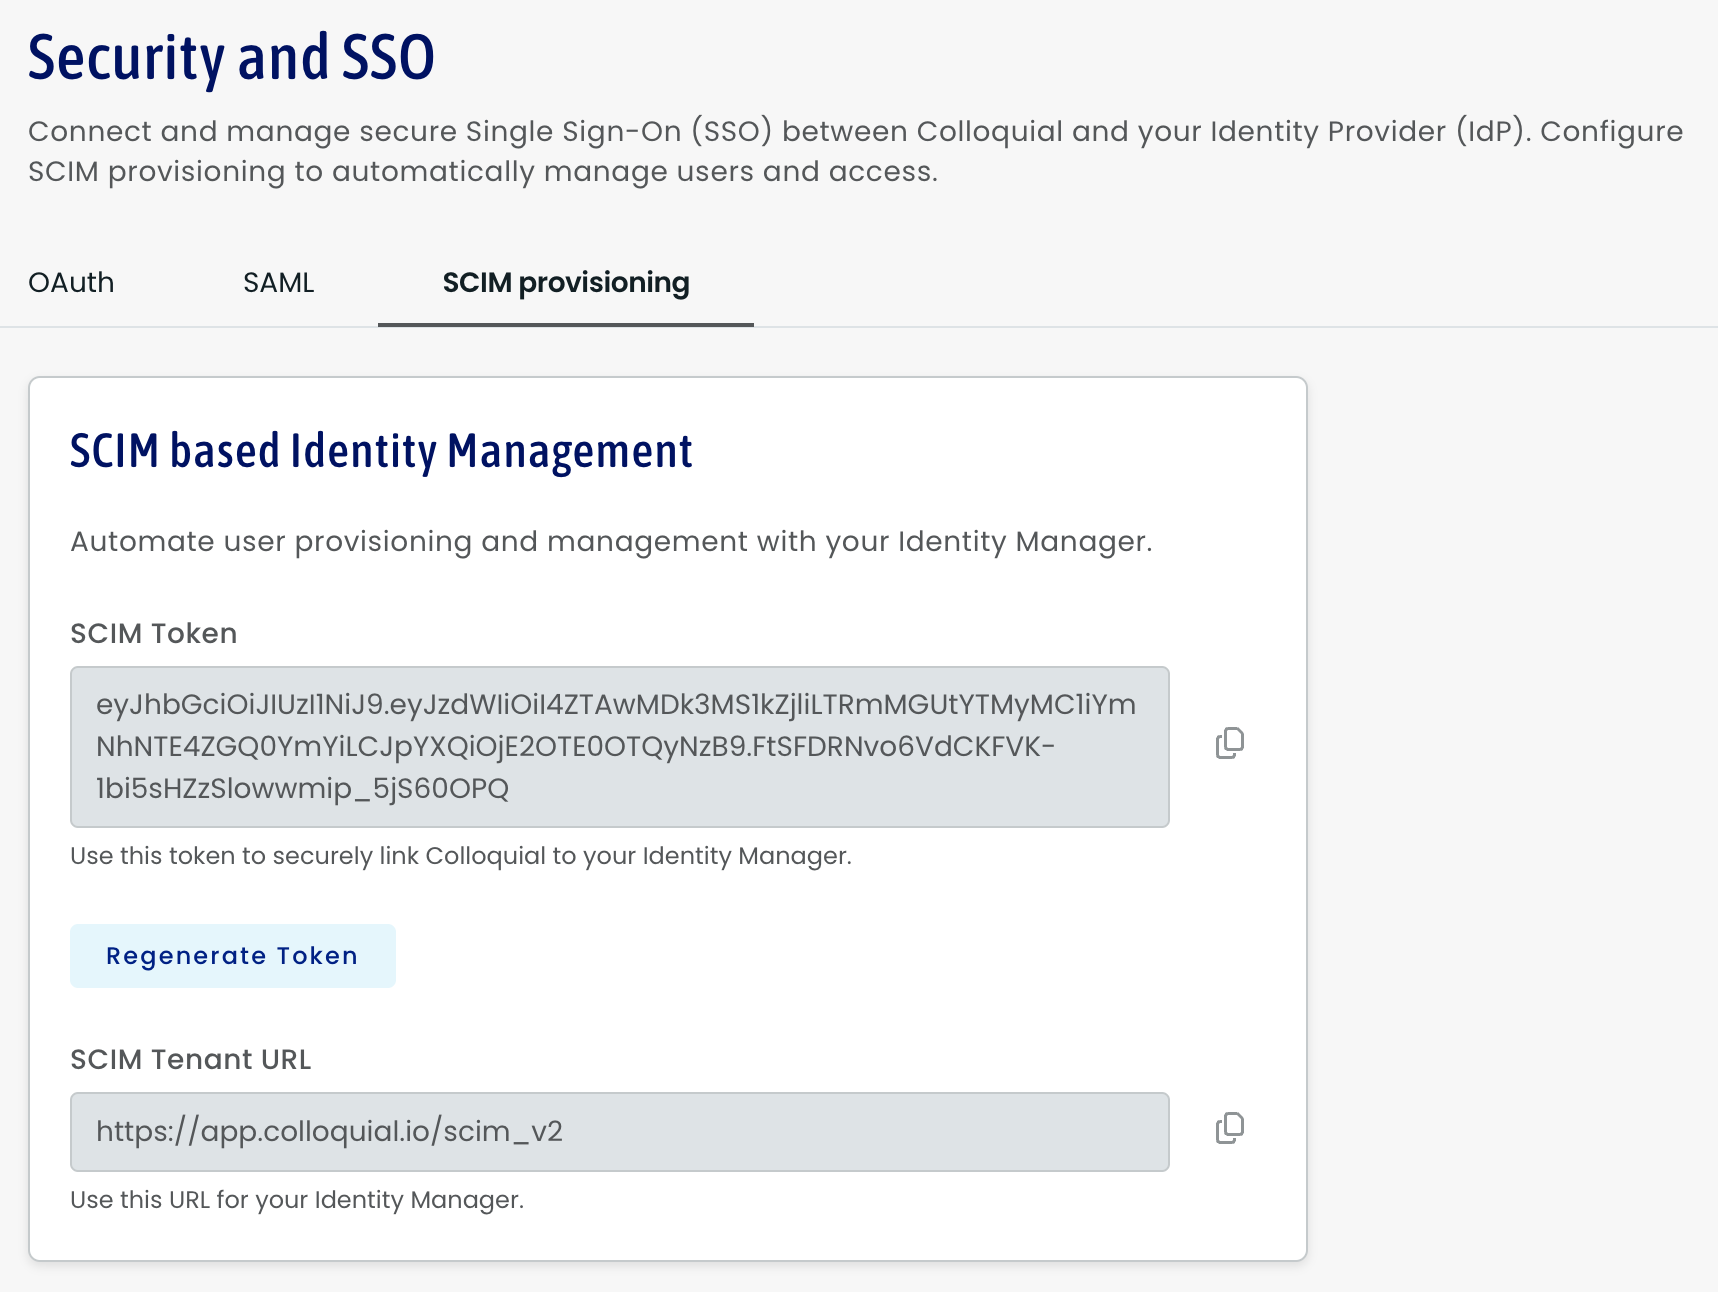
- From the side menu, select Security and SSO.
- Under SCIM, select Generate Token.
- Copy the access token.
Step 3: Configure SCIM provisioning in Azure AD/ Entra ID
- Open the Colloquial app you’ve set up in Azure AD/ Entra ID.
- From the side menu under Manage, select Provisioning.
- Next to Provisioning Mode, select Automatic from the dropdown.
- Under Admin Credentials, input the following:
- Tenant URL: https://app.colloquial.io/scim_v2/?aadOptscim062020
- Secret Token: Enter Colloquial's access token from Step 2
- To verify the connection, click Test Connection.
- On top of the settings window, click Save.
If you need to test automated provisioning for a small number of users before rolling out to everyone, we recommend configuring scoping filters for users and groups first. See Scoping users or groups to be provisioned with scoping filters for instructions.
Configure Attribute Mappings
Users
- Under the Mappings, select Provision Azure Active Directory/ Entra ID Users.
- Under the Target Object Actions, make sure to only select Create and Update.
- Under Attribute Mappings, configure them as follows:

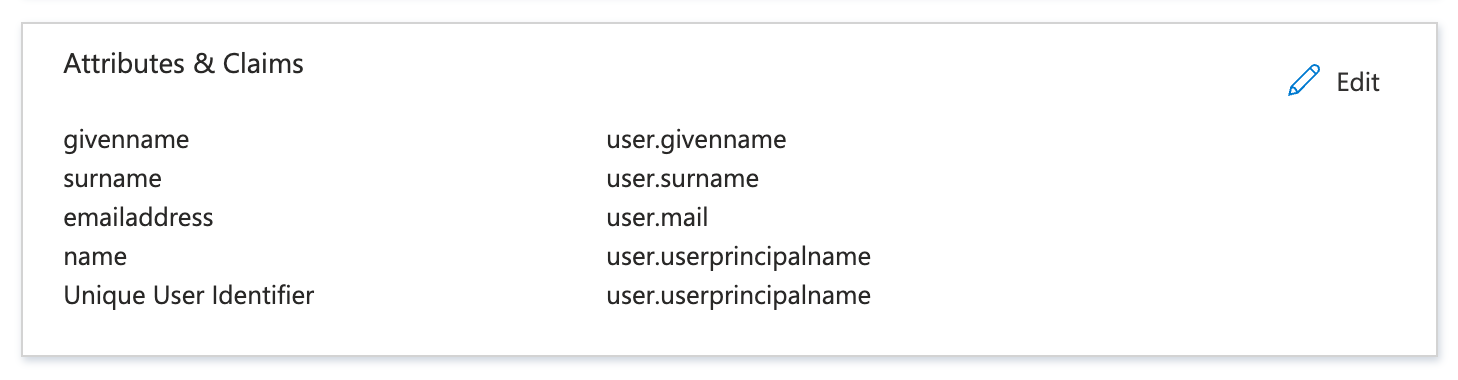
It’s important that the SAML nameId attribute matches the SCIM userName attribute above. Ensure that in the Single sign-on configuration, the Unique User Identifier is mapped to user.userprincipalname, like below:
- Click Save.
Enabling Role Management
Step 1: Configure App Registration Roles
If you have the latest Colloquial App Registration from the Azure Gallery the following roles will be configured. If you have used a Custom App please configure the app as follows.
- Open App Registrations.
- Select the Colloquial App Registration (you may have used a custom name).
- Under App Roles, configure them as follows (use Create app role):
| Display name | Description | Value |
|---|---|---|
| Admin | Users can manage user access and systems settings such as integration. | admin |
| Curator | Users can create and modify Groups, Templates and Views. | curator |
| Contributor | Users can modify Fact Cards and Facts, including Tags and Groups. | contributor |
| Consumer | Users can add new Fact Cards and Facts. | consumer |
| Read Only | Users can read all data but not make any modifications. | read_only |
See the example configuration.

Step 2: Configure Users and Groups
-
Open Enterprise Applications.
Select the Colloquial Enterprise Application (you may have used a custom name).
Under Users and groups, select Add user/group:
Using the Add Assignment options:

Add assignment screen - Under Users and groups click None Selected, and select your configuration (follow your organisation's convention such as usr-sso-colloquial-curator)
- Click the Select button to complete the action.
- Under Select a role click None Selected, and select your desired role from the pane (note: it can take several minutes for new roles to appear).
- Click the Select button to complete the action.

Once complete your list of Users and groups should look similar to below.

Step 3: Configure SCIM Attribute Mapping for Roles
If you want SCIM to manage each person's role in Colloquial, include a role in your attribute mapping.
We recommend using user attribute mapping for role assignment. Mapping the role on the user keeps each person's access tied to their own identity, so they land in Colloquial with the right role the moment they're provisioned.
For Microsoft Entra ID, the roles attribute is only sent in a SCIM-compliant format once you opt in to Entra's newer provisioning behaviour. Amend your Colloquial Tenant URL by appending the aadOptscim062020 flag:
- In Entra, open your application's Provisioning > Admin Credentials.
- Add
?aadOptscim062020to the end of your Tenant URL — for example,https://app.colloquial.io/scim_v2?aadOptscim062020. - Select Test Connection, then Save.
For details on this flag and the behaviour it enables, see Microsoft's Known issues with SCIM 2.0 protocol compliance.

- Select Mappings, and click the Provision Azure Active Directory Users.
- Scroll down until you see Show advanced options and select this option.
- Click the newly available Edit attribute list for customappsso or Edit attribute list for Colloquial (this is determined if you used the published Azure App or created a custom Enterprise App).
- Add a new entry at the bottom of your list
- Name is roles
- Type is String
- Multi-Value? is checked
- Click Save
- Select Add New Mapping
- Mapping Type: Expression
- Expression: AssertiveAppRoleAssignmentsComplex([appRoleAssignments])
- Default value: empty
- Target attribute: roles
- Match objects using this attribute: No
- Apply this mapping: Always
- Click Save.


- Review Attribute Mappings to match below. Press Save.

You will now see roles populated and synced to Colloquial based on a schedule.